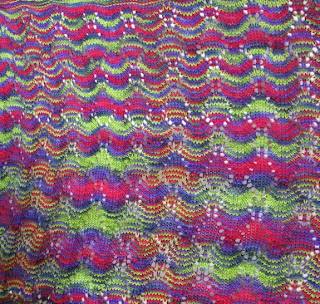
This small blanket is made for a wee tiny baby, and, as the baby grows, may be that special item that gets dragged all over the place. With its smaller size, perhaps it won't be dragged on the ground so much, but perhaps more through air. It's a lightweight blanket perfect for spring/summer. In my opinion, the crazier the colours, the better. This one did some really interesting pooling. It was exciting to knit, to see how things would line up.
You'll Need:
- 1 skein fingering/sock weight yarn (less than 400 yards). I used Tough Love Sock in the Hummingbird colourway. It gave me a 16x22 inch blankie. If you want a bigger one, use more yarn!
- 3mm needles, straight or circular, but you're knitting back and forth.
- Two markers.
The Stitches:
k - knit
p - purl
yo - yarn over - bring the yarn to the front, under the right needle, then over the top of the needle to the back again
k2tog - knit two stitches together
ssk - slip two stitches (one at a time) as if to knit, then slip them back to the left needle and knit them together through the back loop
The Double Circle Pattern:
Row 1: *ssk, k3, yo, k1, yo, k3, k2tog, k1* ssk, k3, yo, k1, yo, k3, k2tog
Row 3: *ssk, k2, yo, k3, yo, k2, k2tog, k1* ssk, k2, yo, k3, yo, k2, k2tog
Row 5: *ssk, k1, yo, k5, yo, k1, k2tog, k1* ssk, k1, yo, k5, yo, k1, k2tog
Row 7: *ssk, yo, k7, yo, k2tog, k1* ssk, yo, k7, yo, k2tog
Row 9: repeat row 7
Row 11: repeat row 5
Row 13: repeat row 3
Row 15: repeat row 1
Row 17: repeat row 1
Row 19: repeat row 3
Row 21: repeat row 3
1. In the chart, the bits between the yellow squares are the repeated sections. Do not knit the yellow squares - they're just markers.
2. Read the pattern starting at row one, reading right to left.
3. Start and end each row with 5 knit stitches, both on the right side and the wrong side.
2. Read the pattern starting at row one, reading right to left.
3. Start and end each row with 5 knit stitches, both on the right side and the wrong side.
4. All rows are purled on the wrong side, except for the five knit stitches at either end.
The Pattern:
Cast on 141 stitches using the long tail method for 10 pattern repeats. If you want it wider than 22 inches, add an additional 12 stitches for each repeat.
1. Knit all stitches for 5 rows.
2. Begin the Double Circle Pattern, maintaining a garter stitch edge of 5 stitches at the start and end of each row - place markers to remind yourself that those 5 stitches have to be knit.
3. Repeat the circle pattern 5 times, or more if you're using more than one skein of yarn.
4. Knit all stitches for 5 rows.
5. Bind off.
The Finishing:
Weave in yarn ends.
Block to desired dimensions.
Put it on a baby, not on a clematis.


This looks like a fun knit - thanks so much! I like using ChartGen to make charts; have you seen it? http://chartgen.orangellous.com/index.php
ReplyDeleteI have seen it now! Thanks for the link - I'll definitely check it out. :O)
ReplyDelete